If you have many lines to add to a requisition or a requisition that is raised on a regular basis it is possible to upload many lines via an excel spreadsheet.
Create a requistion
Log into i2B.
Navigate to the requistion screen (using the left hand menu option)
At the top of the page next to the drop down filter is a “+ New” button. Clicking on this link will start the requisition creation process.

If you have access to multiple companies within the system you will be asked which company you are raising the requisition against. The requisitioner section will autocomplete with your requisitioner username.
Internal Reference / Header fields
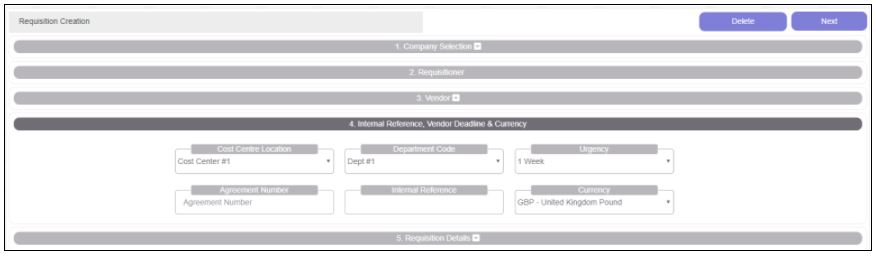
You will be asked to enter / select entries in this section that are specific to your company. The example above shows “Cost Center Location”, “Department Code” etc. This will be different for your company. The headings / drop down selections are specific to your company's configuration.
The selections you make here are important. They are used to determine the approver of your requisition once completed.
The “Internal Reference” is mandatory and the system will also check this is unique, the system can generate this for you, click the symbol next to the internal reference heading to have this generated.
The currency is also important - Again this is used to determine the approver and the limit that you are able to requisition.
Once you’re ready to proceed, click on the “Next” button. Your unique reference will be validated as unique at this point. If a duplicate is found you’ll be redirected back to re-enter.
Part Number Search / Vendor Search
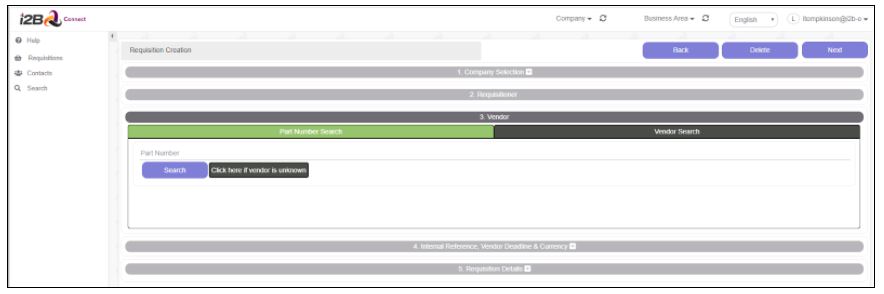
You will be asked to enter in the part or code that you would like to requisition. You have the option here of typing in a part or code into the “Part Number” field. The system will assist you by autocompleting if it finds the code / description you are typing. For example if you type “sign” it will autocomplete with valid parts / codes with the sign as part of the code / description.
The system when you click on search will bring back a list of vendors who have provided this part / code previously. You can then select the preferred vendor from the list.
If you don’t know the part but know the vendor you usually use you can click the “Vendor Search” heading. This will allow you to search all your vendors and select the vendor you’d like to use.
If you can’t find the part / code or vendor or just want to skip this part click on the “Vendor is Unknown” button.
Once you’re ready to proceed click on the “Next” button. Your unique reference will be validated as unique at this point. If a duplicate is found you’ll be redirected back to re-enter.
Upload requistion lines via excel
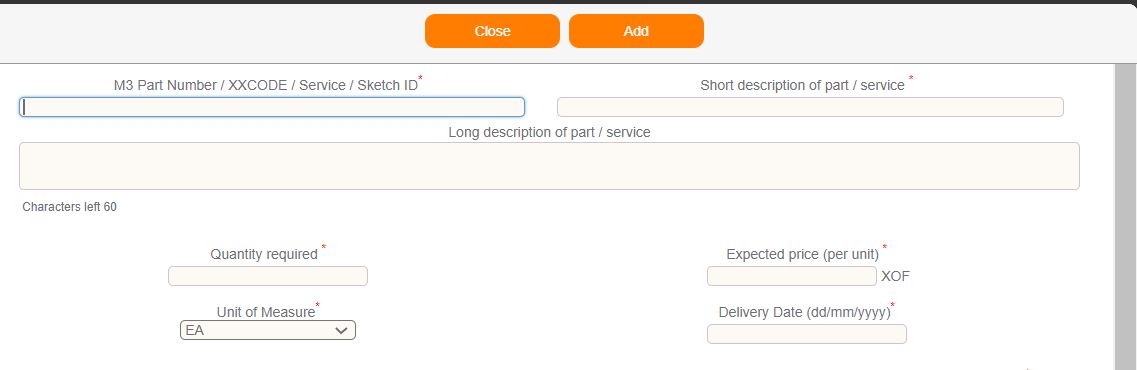
Once you have selected a vendor (or chosen unknown vendor) then the requisition details page will pop up. In order to upload the information via excel select CLOSE from this screen
You will then be taken back to the header information screen (see below), from here click on the option REQUISITION DETAILS
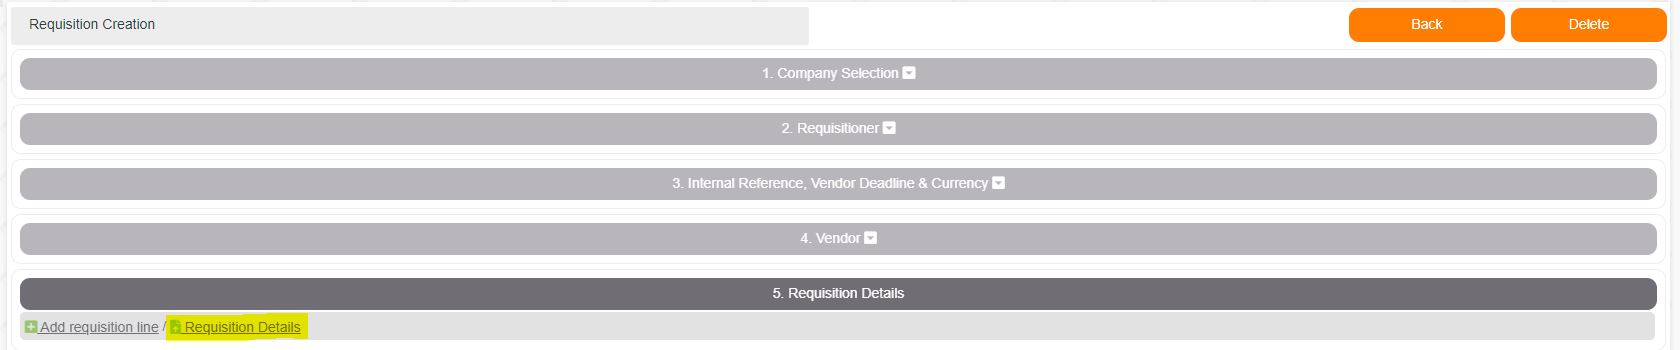
You will then be presentated with a new pop up screen
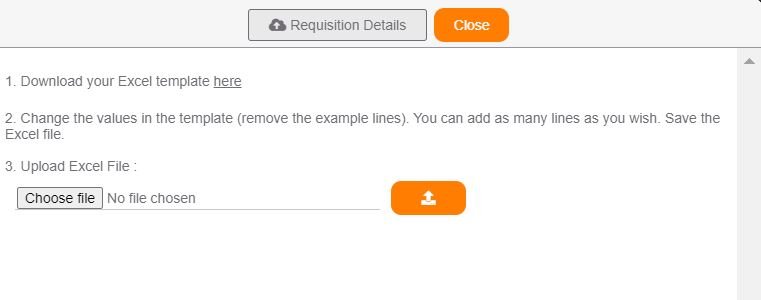
Follow the steps on screen,
First download the excel template, if you are prompted to enable editing click to accept this.

You are then presented with a unique template for your company.
Remove the example lines which are showin in rows 2 and 3.
Complete the requistion lines with the information required, only mandatory fields are requied to be completed every time. It is worth remembering that a field is to be entered with a 0 (zero) at the start then the field mst be prefixed with ' (single quote).
Save your excel document to your local machine.
Upload the excel spreadsheet to i2B (step 3), first click Choose File and navigate to your file then choose the orange upload button.

Depending on the number of lines being uploaded this will determine the time it takes to upload the information into i2B. On each line a check is performed to ensure the data being uploaded valid.
If all data uploaded is called then the user will receive a green SUCCESS message at the top of the page (see below)
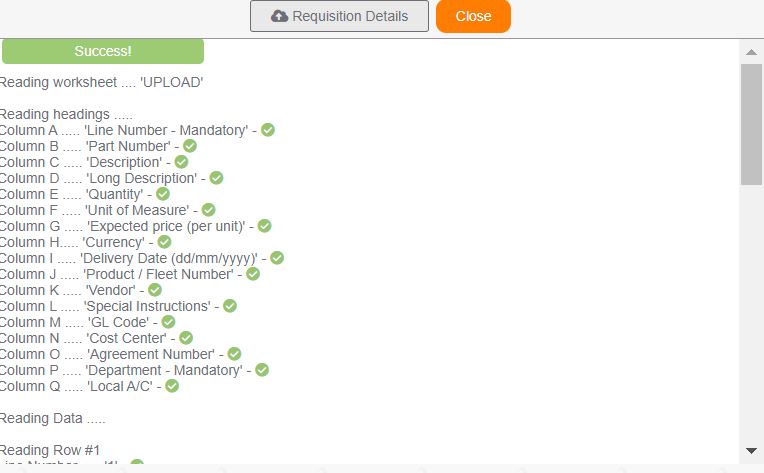
If there are any errors in the information uploaded then this will be highlighted at the top of the pop up screen and also if you scroll down you will see a red X next to the field (or fields) which contain the error.
When the lines have been uploaded they will be presented on screen in the same way as though they were manually entered, one at a time, (see below).
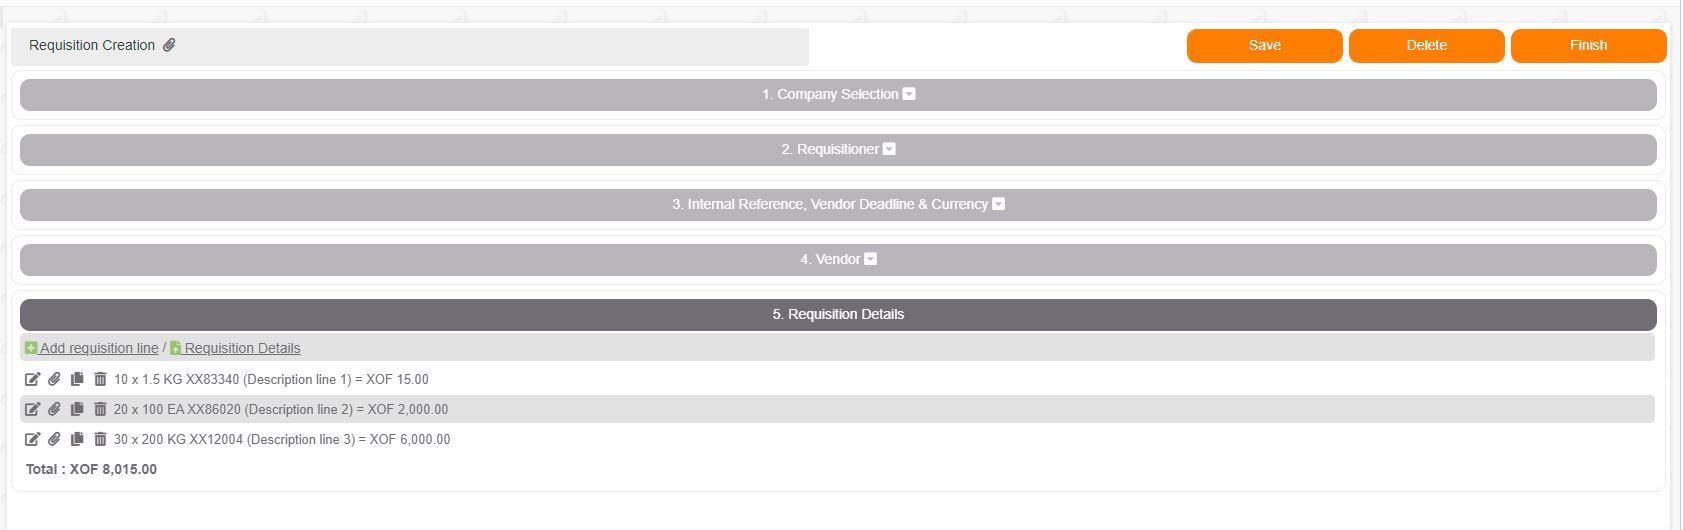
You can still add / amend / attach / copy and delete lines manually.
Click on the “Add requisition line” link to add a new line.
The part number / code field is free entry but mandatory. If you’re not sure of the code or its a product / code that's never been purchased before, then type in a short code for the requisition. The procurement department can complete this later for you with the correct part number / code once it's been created.
Enter in the quantity required and the unit of measure that you’d like. So for example if you want to requisition a laptop, the quantity would be 1 and the unit would be EA (for each). If you wanted to requisition some parts in KG you would enter the number of KG you require and in the unit select KG.
The expected price is per unit. So using the above example, if you’re requisitioning in EA the price would be per each unit. If you’re requisitioning in KG the price would be per KG.
Enter a required delivery date / drop date and then complete the detail line fields.
Once you have completed the line information click on the “Add” button at the top of the screen.
You will be returned back to the requisition creation page.
You can click on the “Save” button at the top of the page at any point. This will save your requisition in its current state and put the status to “Draft”. You can then access this requisition again from your requisitions list by clicking on the requisition number that i2B will generate.
If you click on the “Finish” button this then validates your requisition and automatically selects the correct approver (or approvers) required to approver your requisition.
0 Comments