How to use the i2B Connect System - Vendors
Vendor Guide
Version : November 2024
i2B Limited - Netpark - Thomas Wright Way - Sedgefield - County Durham - UK
hello@i2b-online.com - www.i2B-online.com
How to use the i2B Connect System
Introduction
The purpose of the i2B Connect system is to:
- Provide a more efficient means of communication.
- Reduce administration
- To provide the vendor with more detailed real time information.
As a vendor using i2B Connect you will have access to:
- View RFQ and purchase orders.
- View RFQ and purchase orders that have changed or are new.
- Accept or decline RFQ and purchase orders.
- Request changes to orders and accept / decline changes from your customer
- Create and confirm shipment details.
- Create and confirm service entry sheets.
- Upload invoices
- Search for purchasing documents.
- View contacts.
-
View your own vendor details.
Questions - have you checked the knowledge base for FAQ?
Any problems with the i2B Connect system please contact your purchasing representative.
Logging Into i2B Connect
Vendor Specific information
You will have received an email with your i2B Connect web address link on it.
Enter this into your browser address bar. You will be shown the i2B Connect welcome page. The welcome page is shown (above).
Your Credentials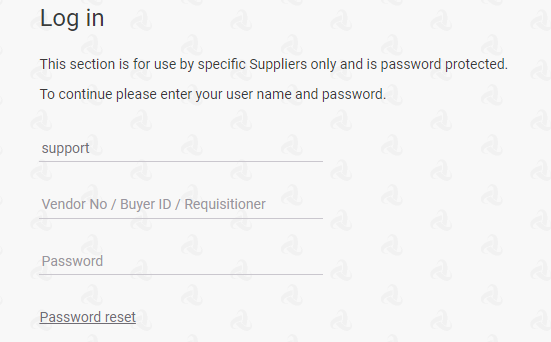
Your username, Vendor Number and password are unique to you and will have already received them via email.
If you require these again, please contact your purchasing representative who emailed you.If you have forgotten your password you can use the “Password Reset” link, to help you reset your user password.
Languages
You can change the language of the i2B Connect system at any time. Click on the language drop down at the bottom of the welcome screen - to select your preferred language.
Terms
By logging into the system and clicking “Accept” you are agreeing to have read, understood and accepted the Terms and Conditions of use of the system.
Customising Your Display
Display & Filter Options
At the top of each page you have the ability to search the current display, filter the company, business area you are viewing and change the language display. See example below
Search: Allows you to search/filter the current display, for a document number or description text.
Advanced Search: This option only appears in the “Document List” module, but it allows you to look for documents in a specific date range.
This section will let you choose to view orders that are in one of several predefined date ranges, overdue orders, or to enter your own custom date range.
Company: If you have access to view orders from more than one company, you can choose which companies data to view from the drop down list.
Business area: If any of the companies you deal with through i2B are divided into Business Areas, you can choose which ones to view from the drop down list. (See example below)
Language Option: Choose from the drop down list of available language options, in which to view the system.
Filter display: Some screens will allow you to filter the displayed results, using the drop down list directly above the data. For example, the “Documents List” display allows you to display just documents needing a response, those that are new or changed, just open orders, and both open and delivered orders. Additionally you can view just the header level information, or the line level data. See image below:
Column Sorting: Clicking on any of the column headings, will sort your display by that column (ascending order). Clicking it again, will change to a descending order.
Column Selection: On each section of i2B Connect, you can tailor the data columns displayed by selecting or deselecting the available columns. Just click on the “Columns” button, as shown below.
Your User Profile
In addition to the filter and display options, the top right corner of the screen allows you to change your user profile, or log out of the system.
Click on your username, in the top left hand corner of the screen to see your profile options.
My Profile
Update your profile details here. You can set your profile picture, welcome message, change your email address, customise what numeric separator you prefer (decimal/thousands) and set your preferred date format.
My Graphs
You can use this option to set your preferences, for the graphs displayed on your dashboard.
Password
Here you can change your profile password - by entering your current, and your new chosen password.
NB: The password has to be a minimum of 8 characters long and include 1 uppercase, 1 lowercase and 1 special character.
Once updated, your new password is active. You can “Log Out” - from the drop down list, when clicking your username - and log back in again using your new password at any time.
i2B Modules - Side Menu
Side Menu Navigation
Options that can be available - depending on your account set up - are seen on the side menu (example on the left). Any option with a number next to them indicates an action is required by you.
Help: Find additional support here.
Dashboard: Allows you to view your order information, and displays interactive, high level graphs.
Documents List: Displays your orders, and allows you to view, action, and interact with them.
Change Request (Vendor): This screen will allow you to request delivery date changes to your orders, and notify them automatically.
Change Request (Buyer): This screen will allow you to accept delivery date changes to your orders from your customer.
Shipping Confirmations: Need to notify your client of items shipped, and generate shipping labels? Here is where you can.
Vendor Deliveries: Here you can view historical delivery information, showing what was delivered, when and if it was on-time.
Vendor Invoices: If made available by the buying company, you can upload and view your invoices here.
Request for Quotations: Have you been asked to provide a quotation for goods/services? You can view details and respond here.
Reports: This contains a range of system reports that you can view or download.
Delivery Schedules: If available you can view a list of delivery schedules here.
Service Entry: This module lets you book time against any option service orders, and notify your client..
Contacts: Find details here of your company contacts, such as buyers and their contact details.
Dashboard
This is your main starting point in the system. From here you can view your documents and graphs, and interact with them.
Example screen shot can be seen below:
Documents:
Using the dashboard display, you can view details of your documents. Example below:
As the example on the previous page shows, each document number is underlined, to show it is a link to the actual document itself.
Graphs:
Various graphs are available on your dashboard, they are split into different tabs , which are interactive. They can be toggled, or clicked to link to data tables, depending on the contents of the graph. (Examples below)
Purchase Orders Dashboard
Deliveries Orders Dashboard
Data Tables & Downloading
Whether you are viewing Documents, Invoices, Deliveries, or something else, i2B will display your data in easy to read, customisable data tables. Each of these screens are designed to give you quick access to the data you and your buyers need.
However, in addition to letting you view - and interact - with your data, you can quickly download any of the data that you are viewing, should you need to.
Look for the download button on each screen
Clicking this, will download the data on the screen to a .xlsx file on your local machine. (Example below)
Working With A Document
View The Document
As mentioned, the “Dashboard” and “Documents List” view will show you the order details - at header or line level depending on your selection. However, any time you see a document number underlined (image left) it is a link, that you can click on, to view the actual document.
Clicking on the link will pop up another display, allowing you to view the order layout, and also interact with it.
Interact With The Document
As well as viewing the document, there are several ways to interact with it.
Of course, you can click the “Print” button to generate a printer friendly version of the order, should you want a paper copy.
You can view any attached files, such as safety certificates, technical specifications, etc. Or attach your own files to any documents, all by using the paperclip link. And you can make comments and ask questions, using the chat link.
Whenever you attach a file or make a comment, the buyer will be automatically notified via email. Likewise, if the buyer makes a comment or attaches a file, you will be emailed to let you know.
NB: The paper clip icon will show in RED if an attachment exists.
You can even record your own reference against the document should you need to - ensuring that any paperwork/electronic record holds your reference, as well as that of the buyer. See image below.
Order Page Links
Parts of the order page can link you to other areas of the system, without having to go back to the main screen.
Clicking on “Delivery Date” will take you to “Change Requests”, so you can ask for a change in date.
You can click on the “Quantity Ordered” (for accepted orders), to allow you to create a delivery note once you are shipping the goods being ordered. This is done in the “Shipping Confirmations” screen.
The link in the “Quantity Received” data, will take you to the “Vendor Deliveries” section for this order.
You can click on the “Unit Price” on the order line where you will be taken to a list of invoices which have been received against that order line. If you have the option enabled you will be able to raise an invoice against the order line.
Change Requests Made By Your Customer
Sometimes your customer would like to request a change. To improve this process, i2B allows them to request a date change via the Portal. You will then be notified of this by email, and you can accept or decline the request, again via i2B.
If your customer allows it, customers can also request a change to the quantity or price. If there are any change requests awaiting your response you’ll see a number (of requests) next to the “Change Request (Buyer)” option.
All change requests, and responses are recorded in the i2B audit trail, so you can always review the order history. From the side menu, when you select “Change Request (Buyer)” you can see a list of change requests made by your customer.
Dealing With A Change Request
The Change Request screen will show you pending and past change requests and their status. For any requests that are awaiting a response, you will see the changed fields highlighted. (Example below)
Accept or Decline
For each change request line that requires action, you need to look to the far right hand side of the line. Here you will see the status (“Awaiting Supplier Response”) and the option to tick “Accept” or “Decline”. You can accept or decline multiple change requests at once by ticking the relevant box(s) then click on the “Update” button at the top of the page.
Whichever action you take the customer will be informed via email and will be able to see the updated information in i2B.
Talk Function
The Talk option - indicated by the icon is available in several areas of the system. However it is worth mentioning specifically here, as it is a great way to communicate with your customer regarding their change requests.
When they make a change request, they can add a comment to give additional information. If you accept the change, then this is enough. However if you decline, then you can add additional information about why and that will be emailed to the customer. It is also recorded in i2B as history against that order, so you have an audit trail to look back on.
If the talk button is highlighted in Green this indicates that comments have been added.
Accept Or Decline An Order
You will be sent an email to alert you to any new or changed documents. New documents will need you to accept or decline them. Also, regular reminders to accept or decline the order will be sent until it is actioned.
Actioning this can be done easily, either from within the document itself, or from the “Dashboard” / “Documents List” screens.
Accept / Decline An Order
When you’re viewing a document that requires action, the ability to accept or decline it, is right there at the top of the screen.
Clicking “Accept” will do just that - accept it. While “Action” will allow you to add comments while accepting, or decline with comments.
Additionally, if your buyer has allowed for it, you can accept just individual lines of the order - rather than the whole order. However this facility is at the buyers discretion.
Whichever action you choose, an email will be sent to the buyer to notify them, and an audit trail recorded that you can review at any time.
Accept / Decline From “Dashboard”
Sometimes you may not need to view the full order page, to know you want to accept/decline it. In that case you can action an order from the main “Dashboard” or “Documents List” view. The advantage with this method is that you can accept multiple orders all at once.
From the “Dashboard” / “Documents List” view, any orders that can be accepted will have a box next to them for you to tick. At the top of the data view is the “Accept Button”. This however, will only allow full orders to be accepted without additional comments.
Should you wish to accept an order with comments, or decline it, you can still do it from here. Just click the Green tick icon next to the order needing action. The image below highlights the important parts of the display for actioning orders this way.
As with the other method, any accepts or declines here, will generate an email to the buyer, and an audit trail.
Shipping Confirmations
When you are ready to ship an order you will be required to generate a shipping confirmation (delivery note). This will notify the buyer, and also allow you to generate, and print out if needed, a delivery note
Creating A Shipping Confirmation
When you are logged into the system, use the side menu bar to choose the “Shipping Confirmations” module.
You will be taken to a screen where you can enter your shipping notification(s), for one or many documents and line items.
Creating your shipping confirmation follows 3 simple steps, as follows.
Step One - Select Items For Shipment
First find the purchase order / order line(s) that you are shipping.
You can do this using the “Search” box at the top of the screen, or by paging through the list.
Once you have found your purchase order / order line, you can enter the quantity you are shipping (it will default to the outstanding balance) and then “Tick” the “Add To Delivery Note” box on the right hand side of the line. Repeat this as many times as you wish for as many purchase orders / lines that are being shipped.
Once you are ready click the “Create Delivery Note” button.
Step two - Adding Tracking Information And Attachments
This is where you need to confirm the delivery date, enter your delivery note number and confirm the shipping method. Enter any tracking information you might have for the buyer to track the shipment.
You can also upload any associated documentation like quality certificates using the “Upload” option.
When everything is entered, press “Update” to continue.
Step Three - Generate A Delivery Note
Once you have clicked on “Update” you will be shown your “Delivery Note”.
You can download shipping labels from here and print your delivery note to accompany the shipment.
You can click on “Download Label File” at the top of the page or “Delivery Note Label” on each line.
Clicking on “Print” will give you a printer friendly version of the delivery note.
An email update will have been automatically sent to the buyer telling them that the goods are on the way. All you need to do now is ship the physical goods.
Service Entry Sheet
When you are ready to confirm completion of a service order you will be required to generate a service entry. This will notify the buyer, and also allow you to generate, and print out if needed, a service entry sheet.
Creating A Service Entry
When you are logged into the system, use the side menu bar to choose the “Service Entry” module.
You will be taken to a screen where you can enter your service entry(s), for a purchase order and line items.
Creating your shipping confirmation follows 3 simple steps, as follows.
Step One - Select Items For Shipment
First find the purchase order / order line(s) that you are shipping. As soon as you select one purchase order, the screen will automatically filter to show just the order lines for that purchase order. You are only allowed to create a service entry for one purchase order at a time. You can select multiple order lines for that purchase order.
You can do this using the “Search” box at the top of the screen, or by paging through the list.
Once you have found your purchase order / order line, you can enter the quantity you are confirming (it will default to the outstanding balance) and then “Tick” the “Add To Service Entry” box on the right hand side of the line. Repeat this as many times as you wish for as many purchase orders / lines that are being confirmed.
Once you are ready click the “Create Service Entry” button.
Step two - Adding Information And Attachments
This is where you need to confirm the service entry date, enter your own vendor reference number and enter any additional information you might have for the buyer regarding your confirmed service. You can also upload any associated documentation like timesheets using the “Upload” option.
When everything is entered, press “Update” to continue.
Step Three - The generated service entry sheet
Once you have clicked on “Update” you will be shown your “Service Entry Sheet”.
Clicking on “Print” will give you a printer friendly version of the sheet.
An email update will have been automatically sent to the buyer telling them that you have confirmed the service.
Raising A Change Request
Sometimes, you may want to accept an order, but need to make changes to it, before you can accept it. “Change Request (Vendor)” gives you an easy way to do this.
From the side menu, when you select “Change Request (Vendor)”, a list of open order lines you can request a change on are displayed. Date change requests are available to all vendors. However, if your buying company has allowed it, you can also request a change to the Quantity and/or Price.
Delivery / Quantity / Price Box - You can request a Delivery Date/ Quantity or Price change to an order line. This does not guarantee you that your change will be accepted. If your change is accepted you will receive an email alert advising you of this as well as a changed order email.
Talk - If the talk button is highlighted in GREEN this indicates that comments have been added. If you are making a request to change something, it may be advisable to add a comment, so you have information to support your change request.
When you have entered your proposed changes, simply tick the update box on each line you’d like to change and then click the “Change Request” button. This will update the system, let the buyer know you want to make a change, and allow them to respond via an i2B email. You will receive a reply telling you whether the change request was accepted or not.
Invoices
If made available by your customer, you can upload and view your invoices into i2B.
There are 2 options. Depending on how your customer has i2B configured you will be able to
a) “Upload Invoice” - upload your invoice copy (e.g. PDF) and send to their accounts payable department or
b) “Electronic Transfer” enter an electronic invoice (matching the purchase order / line / quantity) into i2B and upload your invoice copy (e.g. PDF) to be sent to their accounts payable department.
Have a look at the top of the screen, you will see one of the following options:
Upload Invoice
Click on “Upload Invoice” and you will be able to select your copy of your invoice by clicking on the “Choose file” button and uploading your invoice. Once ready click on the upload button to upload your invoice to send to your customer.
Electronic Transfer
If you see the “Electronic Transfer” option then you will need to perform the following to upload your invoice. Click on the “Electronic Transfer” button.
First enter in your invoice number, invoice date and select your invoice currency and then click “Generate” to create your invoice.
This will create a draft invoice for you to start creating.
You can click “Back” at any time and the invoice can be accessed from the previous screen and updated.
To enter your invoice you need to select from the drop down the purchase order number you wish to invoice.
Then once you’ve selected the purchase order number, select the line you wish to invoice (in this example we’ve selected order number P003259273 to invoice).
Then once you’ve selected the purchase order line number you will be able to enter the quantity you wish to invoice.
i2B will show you the order quantity and quantity that has been delivered to date.
In this example it's showing that 10 have been ordered and delivered, defaulting 10 into the invoice quantity. The price is automatically picked up from the purchase order. If your customer has enabled them you will also have the option to enter additional costs (e.g. shipping) and tax value.
Click on “Add” to add this invoice line to your invoice.
You will be able to see the total invoice value increase and the line appear on the right hand side. You can remove the line if you wish. You can also add comments to the invoice if required.
You can repeat the above process of selecting a purchase order / line / invoice quantity as many times as you wish until the invoice is complete.
You will then need to attach a copy of the actual invoice (e.g. PDF) by clicking on the “Upload Invoice” button.
Once you’ve uploaded the actual invoice, you will then see an option called “Submit Invoice”. This will send the invoice and hard copy to your customer for approval and payment.
Reports
i2B Connect, comes with pre-created reports, so you can see more information about your documents. From the side menu screen when you select “Reports” you will be presented with a list of vendor specific reports.
The reports available include:
SES-Vendor Overdue/Imminent report - A report listing any outstanding service entry requests.
Non Conformity Report - Lists all overdue deliveries.
16 Week Planning Report - Breaks down orders into 16 week buckets. It enables vendors to have a snapshot of the orders raised by "Your Company" that are relevant to them for the next 16 weeks in either Excel or web format.
Purchasing History Report - List of all orders that have been accepted by the vendor within the specified time range.
Delivery Notes Report - A list of all delivery notes / shipping notifications which have been raised from your company to your customer.
Awaiting Acceptance / Overdue / Imminent - A report in 3 parts. the 1st part lists orders which are waiting to be actioned (approved or declined), 2nd part will show a list of order lines which are overdue and the final part are those order lines which are due for delivery.
Request For Quotations - A list of all quotation details, the information can be filtered by a date range and pumped into excel.
Overdue Orders Report - An excel report broken down by order lines which are past their expected delivery date.
Open Orders Report - Similar to the overdue order report however ALL open order lines appear in this excel report not just overdue items.
0 Comments